Make an adorable handprint and photo Easter keepsake with your kiddos!

By now, you know I’m a sucker for keepsakes! The latest one is a Rainbow Keepsake , do check it out! This Easter Keepsake we did in the same way, too cute right? Print a “how-to-recipe” below to keep handy when making your own!
Ingredients and How-to:
Again, we used 1 cup of flour, 1 cup of salt, and half a cup of water. It was colored a light yellow.
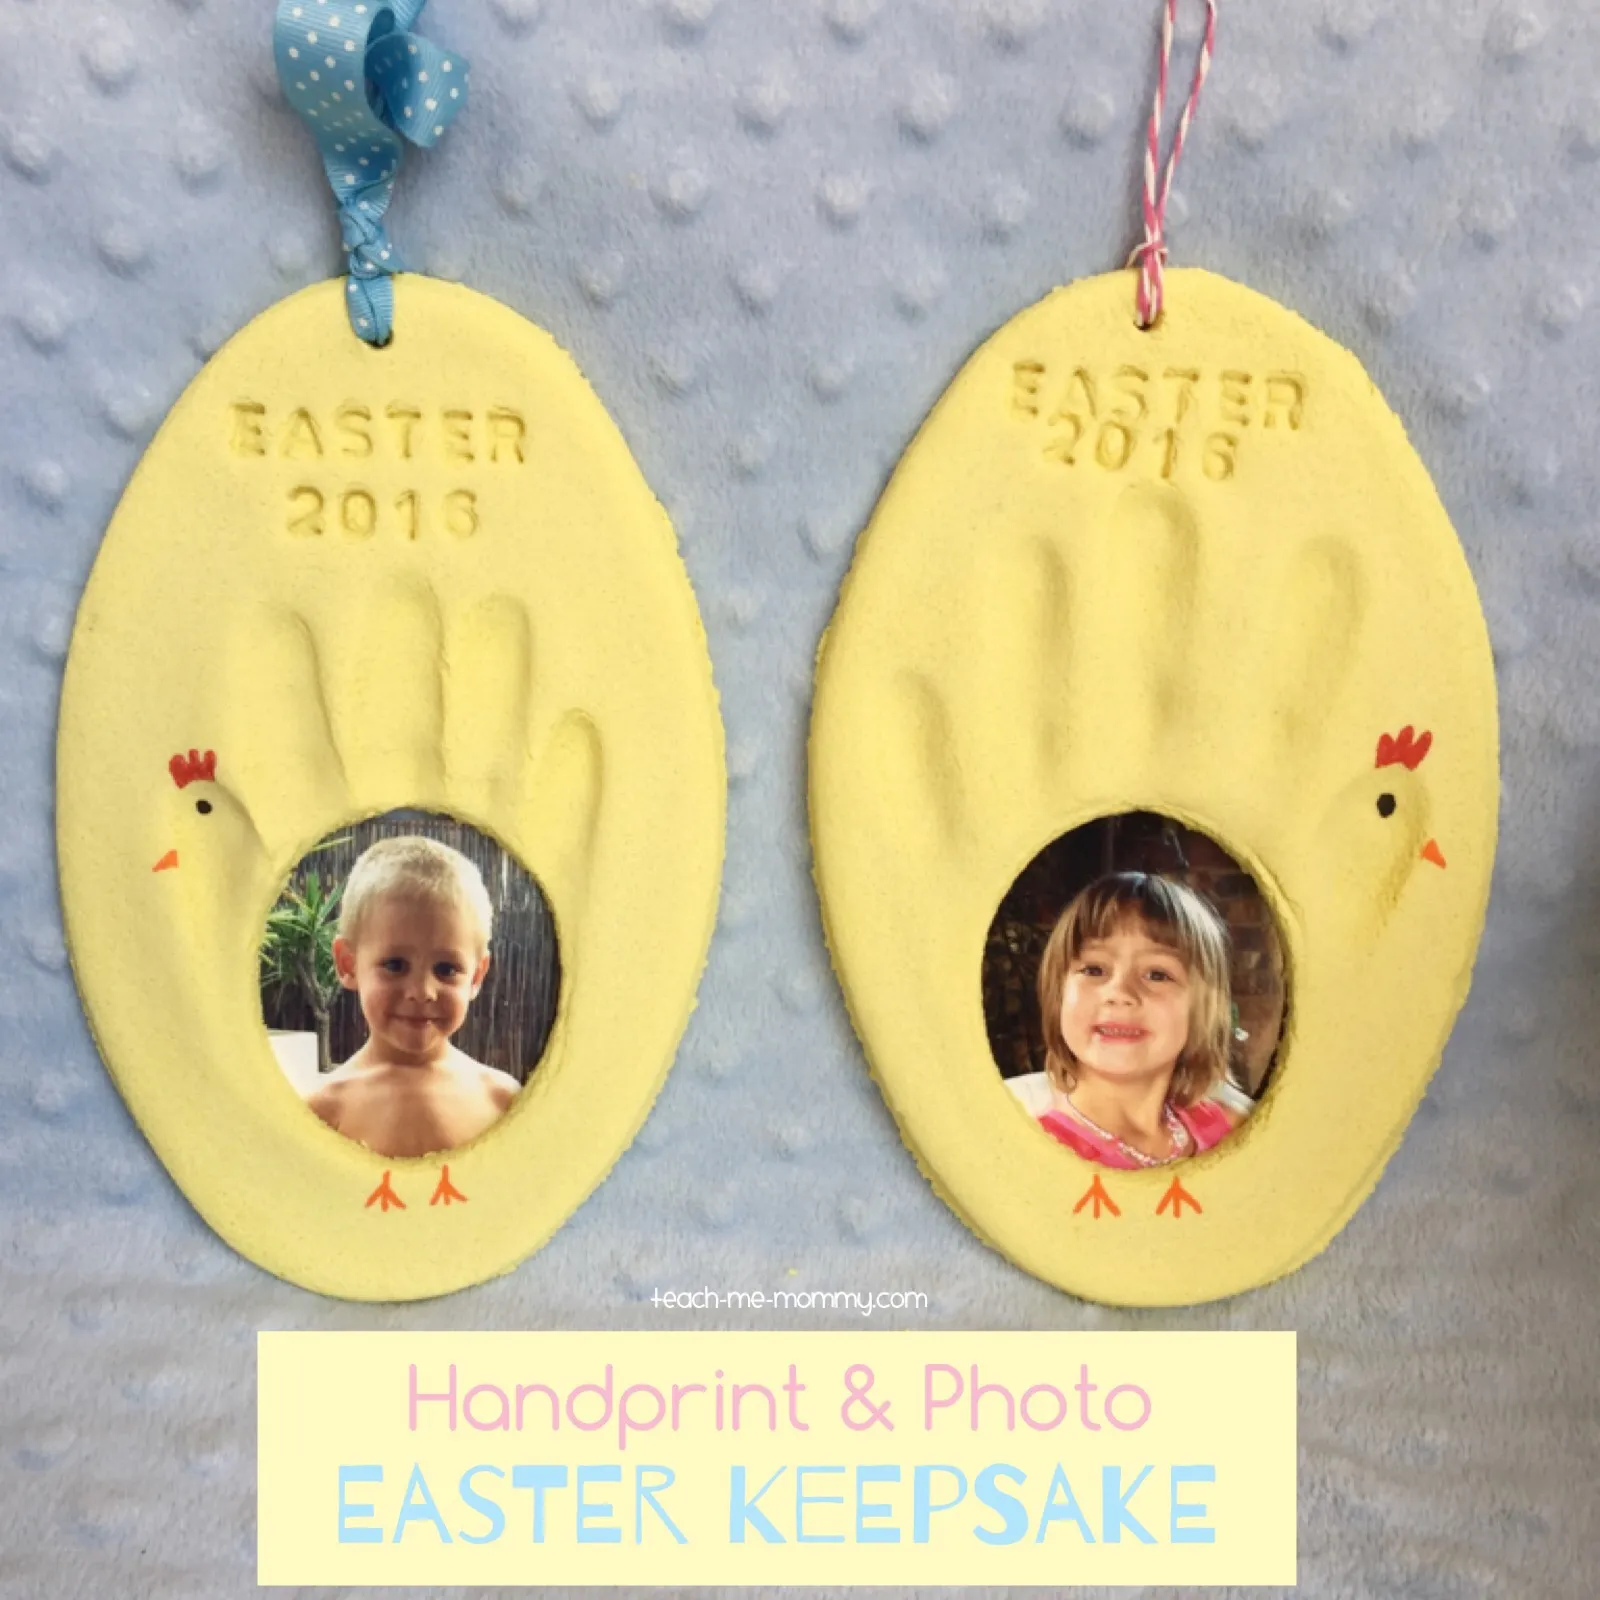
I used an oval-shaped dish to make the eggs. Then the kids printed their hands:

I added the date and ‘Easter’ with my alphabet dough stamps. Then, I couldn’t find our egg-shaped cookie cutter, so I used a plastic cup and pressed it into an oval shape to make the photo frame hole.
It was baked at 70’C for around three hours. I turned it around(face down) to cool and air-dry some more at the back overnight. Once dry, I thought the handprint looks a lot like a chicken, so I added some more features with markers. Obviously, you don’t have to, you could leave it plain too!

I did see with another project that damp weather softened the frame so I would recommend spraying your salt dough project with a Clear Varnish to protect it.
Finally, a photo and string and all done! A lovely Easter keepsake! I bet granny would like these as a gift too! (5 years later and she still has these in her kitchen!)
Easter Keepsake

Make these special salt dough Easter keepsake with a handprint and a photo!
Materials
- 1 cup/250g Plain/Al Purpose Flour
- 1 cup/250g Salt
- 1/2 cup/125ml water
- Yellow Food coloring
Tools
- Large Oval Shape Dish
- Oval Shape Cookie Cutter
- Letter Stamps
- Hand
- Markers
- Ribbon
Instructions
- Mix the ingredients well.
- Color it yellow, mixing well.
- Roll out the dough, about 1cm thick.
- Press the large oval shape.
- Press the hand into the dough to make a good imprint.
- Use the cookie cutter to make the oval shape for the picture.
- Make the small hole at the top for the ribbon.
- Press the date and a message with the stamps.
- Bake for 70'C/160F.
- Leave to cool upside down for 12 hours.
- Decorate as you wish.
- Add the ribbon and photo.
Notes
This can be painted after baking too. Decorate as you wish- you can make a decorated Easter egg without the chick drawings too. Varnish for lasting result.
More keepsakes you might want to see:

Handprints for all Occasions AND see this: The Best Easter Keepsakes and Easter Chick printable keepsake)


Chasity Lavender says
Going to this for my babies in my infant class
Nadia van Zyl says
Thanks for letting me know, I’ll add it in:)
julia says
love your diffrent crafts i printed out this one to do with my grandsons. I wish i could have found things like this when my boys were little. your instructions on the print out does not tell you to bake for 3 hrs i had to reread the post to find the baking time to relize you were saying active for bakeing/cooking .
Chandler bing says
Wow, wonderful easter egg handprint keepsake
Nadia van Zyl says
Leave it a few days, it should harden up more if you are not in too humid/wet weather
Cindy W says
My ornament is still a little soft. I baked it as directed. I have already sprayed poly on it. Any suggestions?
Nadia van Zyl says
Yes, it is glued to a piece of cardboard and that is glued to the frame. Use white or wood glue;)
V says
Hi! Is the picture just glued to the back of the dough? Would any type of glue do?
Nadia van Zyl says
Did you add it to the pop-up you get when you’re on the blog?
Susan says
Thanks. Please add my email address to get your blog.