Teach Me Mommy

Playful and easy activities with the aim to teach

  • Kids Activities
    • Teach my Baby
    • Teach my Toddler
    • Teach my Preschooler
    • Teach me Fine Motor Skills
    • Teach me Literacy/Numeracy
    • Teach me Rhymes
    • Teach me Sensory
    • Teach me Science
  • Holidays
    • Valentine’s Day
    • Easter
    • Christmas
    • Birthdays
  • Gifts
  • DIY
    • Busy Bags
    • Keepsakes
    • Toys
  • Recipes
    • Food Recipes
    • Play Recipes
  • SHOP
  • Freebies

Pumpkin Handprint & Photo Keepsake

September 9, 2016 by Nadia van Zyl 64 Comments

We are a participant in the Amazon Services LLC Associates Program, an affiliate advertising program designed to provide a means for us to earn fees by linking to Amazon.com and affiliated sites.

This month’s handprint and photo keepsake is a pumpkin one! A cute handprint and photo of my little pumpkin!(PS: check out this Thanksgiving Keepsake too!)

pumpkin keepsake
This pumpkin keepsake is very similar to the Apple keepsake in shape, but I painted it afterwards because after the drying process it was too light to my liking. I used liquid food colouring, perhaps the gel kind would keep it from turning light. (I will use gel food colouring next time and report back.)

So with the other keepsakes(see them HERE), the ingredients are equal amounts of flour and salt(1 cup each we had left over) with half water(1/2 cup).

OR, just get this set, follow my instructions and paint it orange afterwards!

The salt dough was rolled out, about 1 cm thick.

I cut and modified the shape until it looked like a pumpkin and added the stump(is that what one calls it?)  process
Then, my son pressed his hand into the dough, not too hard though. A glass was used to make the hole for the photo(still can’t find my circle cookie cutter!) and carefully removed.

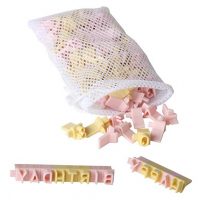
The date was added with these cookie letter stamps and holes were made with a bamboo stick. You could add the child’s name or occasion too.

The keepsake went into the oven for 3 hours(and left overnight, upside down, to dry out more) at plus minus 80’C/160’F.

The next day I added the photo by gluing the photo to a cardboard slightly bigger than the opening and sticking it down with normal white glue. The string was added and then I painted it to get a brighter result.

Yield: 2 keepsakes

Pumpkin Handprint & Photo Keepsake

Pumpkin Handprint & Photo Keepsake

Salt dough pumpkin shape keepsake to use as photo frame

Prep Time 5 minutes
Active Time 10 minutes
Additional Time 3 hours
Total Time 3 hours 15 minutes
Difficulty Medium
Estimated Cost Less than $5

Materials

  • 1 cup of flour(all purpose)
  • 1 cup of salt(fine)
  • 1/2 cup of water
  • orange gel food coloring(or orange paint)
  • brown gel food coloring(or brown paint)
  • string

Tools

  • child's handprint
  • oven
  • round glass/cookie cutter
  • cookie stamps
  • photo

Instructions

  1. Mix the flour and salt.
  2. Add the water. If you are using food coloring, mix it in the water before adding to salt and flour mixture.
  3. Roll out the dough to 1 cm thick(keep a small piece aside for the stump).
  4. Form the pumpkin.
  5. Press the hand so that the imprint is clear.
  6. Use the glass/cookie cutter to make circle for the photo.
  7. Add the stump.
  8. Add the date with the cookie stamps.
  9. Add holes for the string.
  10. Bake the keepsake for 3 hours at low heat(80'C or 160'F).
  11. Take out of the oven, turn upside down and leave overnight to cool.
  12. Add the photo(attaching it to the back and covered up with cardboard with strong glue).
  13. Add the string.
  14. Paint if needed.

Recommended Products

As an Amazon Associate and member of other affiliate programs, I earn from qualifying purchases.

  • Home-X Cookie Stamps Set, 96 Pc.
    Home-X Cookie Stamps Set, 96 Pc.
  • Dr Oetker Neon Orange Food Colour Gel - 10g (0.02lbs)
    Dr Oetker Neon Orange Food Colour Gel - 10g (0.02lbs)
Project Type: DIY / Category: Keepsakes

pumpkin keepsake

A lovely keepsake of my little pumpkin for Halloween time or Fall!

Check out this spooky keepsake too, perfect for the month of October!

Feel free to share!

20534shares
  • Share
  • Tweet

Related Posts

  • Easter keepsake
    Handprint & Photo Easter Keepsake

    By now, you know I'm a sucker for keepsakes! The…

  • keepsake
    Handprint & Photo Keepsake Ornament

      Each year I want to add a photo to…

  • Apple Handprint & Photo Keepsake

    It is time for this month's keepsake, and since a…

Filed Under: default, Keepsakes Tagged With: handprint, keepsake, photo, pumpkin, salt dough

« More, Less, Equal with Sweets & Peg
Symmetry Playdough »

Comments

  1. Julie says

    September 12, 2016 at 8:00 pm

    Another GREAT idea!! x
    Julie recently posted…Paper Mache Process Art – with Taste Safe GlueMy Profile

    Reply
    • Nadia van Zyl says

      September 14, 2016 at 8:35 pm

      Thanks!

      Reply
      • Dianna says

        September 16, 2018 at 6:20 pm

        What is the recipe to make the dough for the pumpkin photo keepsake. New here.

        [email protected]

        Thanks in advance.

        Reply
        • Nadia van Zyl says

          September 17, 2018 at 11:56 am

          Equal amounts of flour and salt, to half of water. So 1 cup of flour + 1 cup of salt + 1/2 cup of water

          Reply
          • Reagan Reno says

            October 18, 2018 at 6:35 pm

            How many pumpkins will it make

          • Nadia van Zyl says

            October 19, 2018 at 10:34 am

            One medium size hand, 2 small size hands

    • Steph says

      October 29, 2020 at 6:25 am

      Hi there,
      Wondering if this will spill or mold over time? Thanks!

      Reply
      • Nadia van Zyl says

        October 29, 2020 at 1:27 pm

        Ours survived a trip around the world in a shipping container..

        Reply
  2. Tracy says

    September 29, 2016 at 3:47 pm

    What kind of paint did you use?
    Great idea!

    Reply
    • Nadia van Zyl says

      September 29, 2016 at 3:49 pm

      Normal tempera paint;)

      Reply
  3. Ryann says

    September 29, 2016 at 5:03 pm

    Hi! I found you on Pinterest and I love this craft, so cute and easy!

    I included a text link to it in my blog’s round-up post, but I was looking for an email address to contact you to ask your permission to use an image as well?

    Thanks for making such cute things!

    Reply
    • Nadia van Zyl says

      September 29, 2016 at 5:07 pm

      No problem, thanks for linking back;)

      Reply
  4. Jessica says

    October 4, 2016 at 3:27 pm

    These can be put in a regular oven right? If so what is the time and temperature. Is it 160 degrees and 3 hours in a regular oven too? Also did you leave them in the oven overnight and at what temperature do I leave it on over night? I want to make these with my kids for our Sunday school class. Thanks for sharing this

    Reply
    • Nadia van Zyl says

      October 4, 2016 at 3:30 pm

      A regular oven is fine. The lower the heat, the better. I put mine in for the 3 hours, then take it out of the oven to harden more overnight, upside down.

      Reply
      • Sose says

        October 13, 2017 at 9:19 pm

        How in advance can you make the dough? I want to make it for my Sunday school class and was wondering if I could make the dough the night before. Thanks.

        Reply
        • Nadia van Zyl says

          October 14, 2017 at 1:01 pm

          You can. Just keep it in a ziploc bag.

          Reply
  5. Jennifer Tenenbaum says

    October 6, 2016 at 10:53 pm

    Hi- I can’t wait to do this! How did you fasten the picture to the back?

    Thanks for the super cute idea!

    Reply
    • Nadia van Zyl says

      October 7, 2016 at 7:30 am

      Glued to a piece of cardboard, then to the back of pumpkin

      Reply
    • Nadia van Zyl says

      October 14, 2016 at 7:49 pm

      Liquid glue;)

      Reply
  6. Jennifer Tenenbaum says

    October 19, 2016 at 7:06 am

    I put it on a cookie sheet and it came out disastrous. Do you just put it directly on the oven rack?

    Reply
    • Nadia van Zyl says

      October 19, 2016 at 6:37 pm

      No I do put it on a cookie sheet. Was it crumbly?

      Reply
      • Jennifer Tenenbaum says

        October 19, 2016 at 9:36 pm

        I just couldn’t get it off. Do you let it cool completely before taking it off with a spatula? I was very careful but the back ended up completely destroyed.

        Reply
        • Nadia van Zyl says

          October 20, 2016 at 6:14 am

          You have to put it on baking paper/wax paper on the cookie sheet. Sometimes the paper still stick to the back, but it does not really matter. So sorry it was a disaster, but do try again☺️

          Reply
          • Jennifer Tenenbaum says

            October 20, 2016 at 7:37 pm

            Perfect. Thank you!

  7. Alexa Rojas says

    November 14, 2016 at 11:04 pm

    Our dough came out too sticky theretofore the hand-print would not form….. should we add more flour.. salt? What do you recommend. Thanks!!

    Reply
    • Nadia van Zyl says

      November 15, 2016 at 6:17 am

      Add equal amounts of flour and salt until it is not sticky anymore:)

      Reply
  8. Ashley says

    September 26, 2017 at 7:04 pm

    How many keepsakes will this recipe make? Do you think this will make 4 preschool sized hands?

    Reply
    • Nadia van Zyl says

      September 27, 2017 at 9:08 am

      No, only about two small hands. Rather double the recipe;)

      Reply
  9. April says

    September 30, 2017 at 3:07 am

    I have done this every year with my granddaughter for a present to her parents for Christmas she is 4 now an we are going to do it again this year I love this

    Reply
    • Nadia van Zyl says

      September 30, 2017 at 2:40 pm

      That’s fabulous!

      Reply
    • Nadia van Zyl says

      September 30, 2017 at 2:41 pm

      Also, try this one: http://teach-me-mommy.com/handprint-photo-keepsake-ornament./

      Reply
  10. Kay says

    October 2, 2017 at 3:46 am

    When you out it in the oven, do you put it in upside down to cook? At what degrees do you set the oven on?

    Reply
    • Nadia van Zyl says

      October 2, 2017 at 6:40 pm

      First right side up at 180’C or the lowest F you can. Turn it around after three hours too see how dry it is. If it looks wet, bake for another 1hour or so until it is dry

      Reply
  11. Ellyce says

    October 2, 2017 at 4:44 am

    We tried making these. We left them in the oven for 6 hours at 180 degrees and they are still moist a day later . What went wrong?

    Reply
    • Nadia van Zyl says

      October 2, 2017 at 6:38 pm

      Perhaps they were too thick? Try turning them around and baking again

      Reply
  12. Marsha says

    October 9, 2017 at 10:00 pm

    Wallet size photo?

    Reply
    • Nadia van Zyl says

      October 10, 2017 at 5:23 pm

      Yes

      Reply
  13. Maureen says

    October 13, 2017 at 2:42 am

    I was interested in making these with our preschool class of 14 children. Is it possible to make the dough a day or longer before we use them in class? Does the dough dry up too quickly in a plastic zip bag to do that? Thanks!

    Reply
    • Nadia van Zyl says

      October 13, 2017 at 3:05 pm

      It will be fine in a ziploc bag, I think

      Reply
  14. Jennifer says

    October 13, 2017 at 3:45 pm

    I’m not crafty what so ever. I am going to make sure I have everything understood!

    -Equal parts flour and salt (what’s recommended for 2 small hands?) – add 1/2 cup water
    – roll out 1 in thick, press hand in softly, cut out circle
    – put on wax paper right side up, bake on lowest F setting for 3 hours

    This is where I get a bit confused I’ve seen you mention right side up and face down for the baking/cooling do you mind breaking it down for me?

    Thank you so much for the help. I love doing things with the kids but I’m so not good at figuring this stuff out on my own.

    Reply
    • Nadia van Zyl says

      October 13, 2017 at 7:30 pm

      -About one and a half cup of flour and one and a half cup of salt
      – the dough should not be more than 1cm thick when rolled out
      – right side up just means you should see the print, not the flat side
      – when cooling you can turn the piece around, so the print lies face down
      Hope it help. I really should make a video. Will have to do that soon;)

      Reply
  15. Heidi brant says

    October 7, 2016 at 3:13 am

    Did you glue the picture?

    Reply
  16. Nadia van Zyl says

    October 7, 2016 at 7:29 am

    Yes, first on a piece of cardboard,then to the back

    Reply

Trackbacks

  1. 20 Halloween Crafts for Kids | This Mummy Loves... says:
    September 27, 2016 at 11:25 am

    […] a sucker for anything keepsake, so this pumpkin handprint and photo keepsake is perfect for using as a decoration year after year just to remember how teeny tiny they once […]

    Reply
  2. 13 Halloween Nature Crafts - Crafting a Green World says:
    September 28, 2016 at 4:27 pm

    […] 7. pumpkin handprint. Use your favorite salt dough recipe for this project, and to make it extra cute, add a photo of your kiddo in this year’s Halloween costume. […]

    Reply
  3. Halloween Nature Crafts for Kids - Crafting a Green World says:
    September 28, 2016 at 4:30 pm

    […] 7. pumpkin handprint. Use your favorite salt dough recipe for this project, and to make it extra cute, add a photo of your kiddo in this year’s Halloween costume. […]

    Reply
  4. 40+ Do-able Halloween Crafts for Toddlers and Preschoolers says:
    October 4, 2016 at 7:33 pm

    […] This pumpkin art is just too pretty and these handmade pumpkin cards are just too special as well as a lovely pumpkin handprint & photo keepsake. […]

    Reply
  5. Spooky Handprint & Photo Keepsake - Teach Me Mommy says:
    October 5, 2016 at 12:00 pm

    […] keepsake perfect for October is this pumpkin one! Check it […]

    Reply
  6. 31 Pumpkin Kids Crafts For Halloween - The Suburban Mom says:
    October 18, 2016 at 5:12 pm

    […] Salt Dough Pumpkin Handprint – Teach Me Mommy […]

    Reply
  7. Handprint Keepsakes for all Occasions - Teach Me Mommy says:
    March 4, 2017 at 4:45 pm

    […] […]

    Reply
  8. 50 Fall Crafts for Kids - Look! We're Learning! says:
    August 22, 2017 at 12:04 pm

    […] Pumpkin Handprint Photo Keepsake – Teach Me […]

    Reply
  9. Fall Art Projects: Pumpkin Keepsake - The Boys Store Blog says:
    September 22, 2017 at 5:01 pm

    […] that lets them play with things sticky, and messy.  This simple craft was created by Nadia at Teach Me Mommy. I really loved her take on the clay handprint because it not only gave you a handprint but she […]

    Reply
  10. Fall Bucket List - 32 Fun Ideas to Enjoy + Free Printable says:
    September 28, 2017 at 8:23 pm

    […] • Random Act of Kindness • Roast Marshmallows • Go on a Nature Walk • Paint a Pumpkin • Make Handprint Pumpkins • Drive-In Movie • Visit a Local […]

    Reply
  11. OctoddlerFest: The Perfect Halloween For Your Toddler | Uninvincible Mom says:
    October 12, 2017 at 12:19 pm

    […] Pumpkin Handprint & Photo Keepsake by Teach Me Mommy […]

    Reply
  12. - Mommy Enlightened says:
    July 25, 2018 at 8:55 pm

    […] Pumpkin Handprint & Photo Keepsake from Teach Me Mommy […]

    Reply
  13. Pumpkin themed activities for toddlers - Fall and Halloween! - My Bored Toddler says:
    August 6, 2018 at 1:45 pm

    […] Pumpkin Photo Keepsake – Teach Me Mommy  […]

    Reply
  14. 11 Fall Crafts You Have To Try This Autumn - Blush and Pine says:
    August 6, 2018 at 6:06 pm

    […] Pumpkin Handprint and Photo Keepsake […]

    Reply
  15. 15 Pumpkin Project Ideas - Poofy Cheeks says:
    August 15, 2018 at 6:00 pm

    […] Pumpkin Handprint and Photo Keepsake from Teach Me Mommy […]

    Reply
  16. 45+ Autumn Activities for Preschoolers - Crafts on Sea says:
    August 30, 2018 at 9:46 am

    […] Pumpkin handprint photo keepsake from Teach Me Mommy […]

    Reply
  17. Fall Crafts and Activities - More Than A Homeschool Mom says:
    September 4, 2018 at 1:00 pm

    […] Pumpkin Handprint Photo Keepsake from Teach Me Mommy […]

    Reply
  18. The Ultimate Fall Bucket List: Self-Care and Kid Friendly Ideas says:
    September 7, 2018 at 7:54 pm

    […] Pumpkin Hand Print Keepsake […]

    Reply
  19. 40 Fun Halloween Crafts for Toddlers - Motherhood Sprouting says:
    September 10, 2018 at 2:01 pm

    […] this pumpkin handprint and photo keepsake if you’re looking for another Halloween craft that you’ll want to save and use as decor […]

    Reply
  20. 10 Adorable Pumpkin Kid Crafts • Mom Collaborative says:
    September 25, 2018 at 12:18 am

    […] Hand Print and Photo Keepsake Pumpkin By: Teach Me Mommy (Click Here) […]

    Reply
  21. Geschenke basteln mit Kindern für Weihnachten oder Geburtstag says:
    December 10, 2018 at 9:54 pm

    […] http://teach-me-mommy.com […]

    Reply

Leave a Reply Cancel reply

Your email address will not be published. Required fields are marked *

CommentLuv badgeShow more posts

Looking for something specific? Use this button:

Welcome!

Hi! I'm Nadia! A remedial therapist and mommy who loves to be creative and share easy activities you can do at home with your kids too! Read More…

Visit our TpT Store

TpT store logo

Connect with us!

Social_Media_Icons_CtrlAltDesign_V2-04  Social_Media_Icons_CtrlAltDesign_V2-27Social_Media_Icons_CtrlAltDesign_V2-19  Social_Media_Icons_CtrlAltDesign_V2_PinterestSocial_Media_Icons_CtrlAltDesign_V2-29

Categories

More

  • About us/Contact
    • Contact
  • Disclosure & Privacy Policy
  • Freebies
  • SHOP
  • Thanks

Freebies Sign-Up

Copyright © 2021 · Delightful theme by Restored 316